OpenCTI #8 - Use the API
Discover OpenCTI in this series. This 8th episode will give you an overview of the Python API that can be used to interact with OpenCTI.
In the last episode, we saw the advanced features we could use in OpenCTI's GUI. Sometimes, this is not enough and we want to do even more advanced actions or automate some tasks.
OpenCTI is an API-driven application, the GUI uses the GraphQL API exposed by the backend. And so does the Python API client. Without further ado, let's dive into it.
First steps
Installing the API client for use in Python is straightforward:
pip install pyctiIf you have a specific version of OpenCTI (i.e. not the latest), keep in mind that there are often breaking changes. You should match the pycti version with the one of OpenCTI.
As said in the introduction, OpenCTI is an API-driven application. So, no specific permission is needed to access it through an API client. You can use any user account in accordance with the permissions required by the actions you want to do using the API.
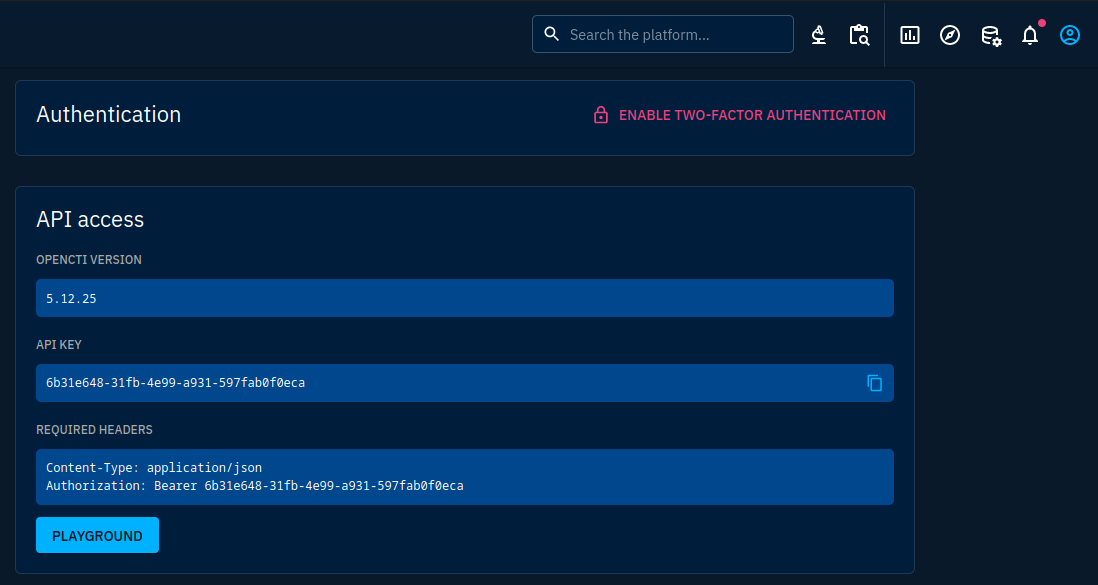
You will need 2 pieces of information to run the API client:
- Your OpenCTI instance's base URL
- The authentication token of your user. You will find it in your user profile.
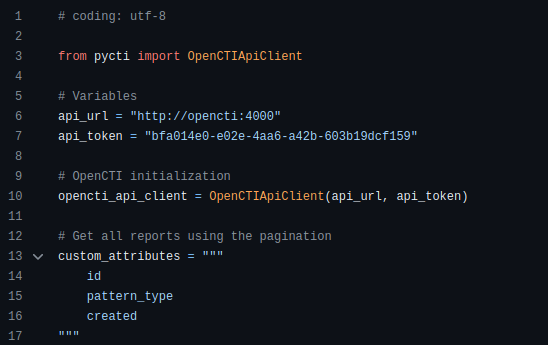
Once you have installed pycti, and got the information needed, you can test connectivity to your platform:
import pycti

OPENCTI_URL = "https://opencti" # Your OpenCTI base URL
OPENCTI_TOKEN = "6b31e648-31fb-4e99-a931-597fab0f0eca" # Your OpenCTI token

opencti_client = pycti.OpenCTIApiClient(OPENCTI_URL, OPENCTI_TOKEN)
If the script above does not end in any error, you are successfully authenticated on OpenCTI.
Creating and getting data
The pycti repository contains several examples that will be good starting points for what you want to do, but note that the documentation doesn't cover the whole API and you will have to dig into the code itself. I'll give you some classical examples and then discuss some functions you can use on top of the data and how to get the information you need.
Nearly everything will go through the OpenCTIApiClient object. Using it you can access, change or create objects in OpenCTI. This takes the form of fields providing access to all supported object types:
indicator_list = opencti_client.indicator.list()Here are some examples of objects you can access:
- indicator
- campaign
- identity
- intrusion_set
- location
- malware
- report
Some special objects allow you to access STIX2 knowledge:
- stix_domain_object
- stix_core_relationship
- stix_cyber_observable
In the more general case, your linter should suggest any object type you'd want.
Most objects will have common methods:
- list (list and search objects)
- read (read a specific object)
- create (create or update an existing object following the upsert principles)
For each type, parameters will differ but you can find common ones such as filters, search terms, pagination or whether to update or not an object (when using create).
Creation of SDOs and SROs goes through defining each attribute in kwargs. Creation of SCOs will imply using the observableData parameter which will contain a dict describing the SCO's data.
The difference can be spotted in examples from the pycti project:
indicator = opencti_client.indicator.create(
    name="C2 server of the new campaign",
    description="This is the C2 server of the campaign",
    pattern_type="stix",
    pattern="[domain-name:value = 'www.5z8.info' AND domain-name:resolves_to_refs[*].value = '198.51.100.1/32']",
    x_opencti_main_observable_type="IPv4-Addr",
    valid_from=date,
)
Attributes of this indicators are passed as kwargs of the create method of the indicator object provided by the API.
observable_ip = opencti_client.stix_cyber_observable.create(
    observableData={
        "type": "ipv4-addr",
        "value": "8.8.8.8",
    }
)
Attributes of the observable are passed as a dict.
To have an explicit list of all arguments for each method (create, list, read), there is unfortunately no comprehensive documentation. One exists at https://opencti-client-for-python.readthedocs.io/en/latest/client_usage/getting_started.html but is incomplete.
Getting in the source code to determine arguments is not really difficult but you can speed up reading by going through the following process:
- Go to
pycti/api/opencti_api_client.py - Find the section where all objects are attached to the main API object (look for
# Define the entities) - Identify the object name, you will find it in
pycti/entities/ - Look for methods and
kwargsparsing in each method
Another way consists in looking into the examples folder but this is limited to the set of features highlighted by the maintainers. It is useful to understand main features but specific ones will require going through the source.
Now we went through the painful part, let's talk about listing and searching data. Basically, it works like in the GUI: you can search by keyword and specific filters. The main plus compared to the GUI is that you can build even more complex filters.
To filter by keyword, just use the search parameter of the list method to specify your search string:
opencti_client.stix_cyber_observable.list(search="65.89.87.4")To use more complex filters, the idea is to nest filter objects in the form of recursive dict objects. The top-level filter object is in fact a FilterGroup object that will gather several filters with boolean operators. You can nest additional filter groups in a filter group along with simple filters.
In the real world, the filter group object you would put in a filter parameter will look like:
opencti_client.report.list(
  {
    "mode": "and", # Boolean operator to combine filters and groups
    "filters": [
      # Reports of type threat-report
      {
        "key": "report_types",
        "mode": "or",
        "operator": "eq",
        "values": ["threat-report"]
      }
    ],
    "filterGroups": [
      {
        "mode": "or",
        "filters": [
          {
            "key": ["confidence"],
            "mode": "and",
            "operator": "gt",
            "values": ["70"]
          },
          {
            "key": ["objectMarking"],
            "mode": "and",
            "operator": "not_nil",
            "values": []
          }
        ],
        "filterGroups": []
      }
    ]
  }
)
The above filter cannot be created using the GUI in OpenCTI 5.12 (it should be possible in future versions). We can summarize it the following way:
Report Type = "threat-report" AND (Confidence > 70 OR Object Marking is not nil)Filigran goes more in depth with filters in this blog article.
The list method also takes parameters for pagination. This way you can sweep through high numbers of objects without compromising application performances:
data = {"pagination": {"hasNextPage": True, "endCursor": None}}
while data["pagination"]["hasNextPage"]:
  data = opencti_client.report.list(
    first=10,
    after=data["pagination"]["endCursor"],
    withPagination=True,
    orderBy="created_at",
    orderMode="asc",
  )
  for report in data["entitites"]:
    print(report.name)
The list method returns a Python list object when pagination is not used. However, when using pagination, note that it returns a dictionary object containing the pagination data (such as the current cursor and whether there is still more data to fetch) along the returned objects under the entities key.
As you can see in the code snippet above, using pagination requires to undertake several steps:
- Initialize pagination by setting an empty cursor
- List entities by setting
withPaginationtoTrue,firstto whatever number of objects you want to retrieve at once,afterwith the empty cursor (this will retrieve the first 10 objects) - Loop until you have no more objects to handle using the
endCursorof the previous page as theafterparameter - Use the data immediately or store it in a dict for later use
Retrieving a unique object works very much like listing. Just replace the list method by read. Obviously, pagination will not work and the returned object will be directly the one you asked for.
Finally, you can also directly retrieve objects when you know their UUID in the platform or their STIX ID:
# Retrieve a report by STIX ID
opencti_client.report.get_by_stix_id_or_name(stix_id="report--76f9c469-12c5-547c-9a14-2b0bbc88e25e")
# Retrieve a generic STIX Domain object by STIX ID
opencti_client.stix_domain_object.read(id="report--76f9c469-12c5-547c-9a14-2b0bbc88e25e")
# Retrieve a relationship object by platform ID
opencti_client.stix_core_relationship.read(id="2bfefe2c-701f-4dcd-932f-0de5bd0e89b6")
Other actions
Besides pure CRUD operations, you can run actions through specific methods.
Promote an observable to an indicator
OpenCTI has the ability to automatically create indicators in the STIX patterning format starting from observables. You can access this feature through stix_cyber_observable's promote_to_indicator method:
# First, create an observable for the demo:
observable_ip = opencti_client.stix_cyber_observable.create(
    observableData={
        "type": "ipv4-addr",
        "value": "5.199.162.132",
    },
    x_opencti_description="A compromised router used by APT28"
)
print(observable_ip)

# Now, promote this observable to an indicator.
# OpenCTI will create the indicator with the corresponding pattern
# It will also create a "based-on" relationship between both
observable = opencti_client.stix_cyber_observable.promote_to_indicator(id=observable_ip["id"])
print(observable)
When looking for the relationship in the GUI, we find:
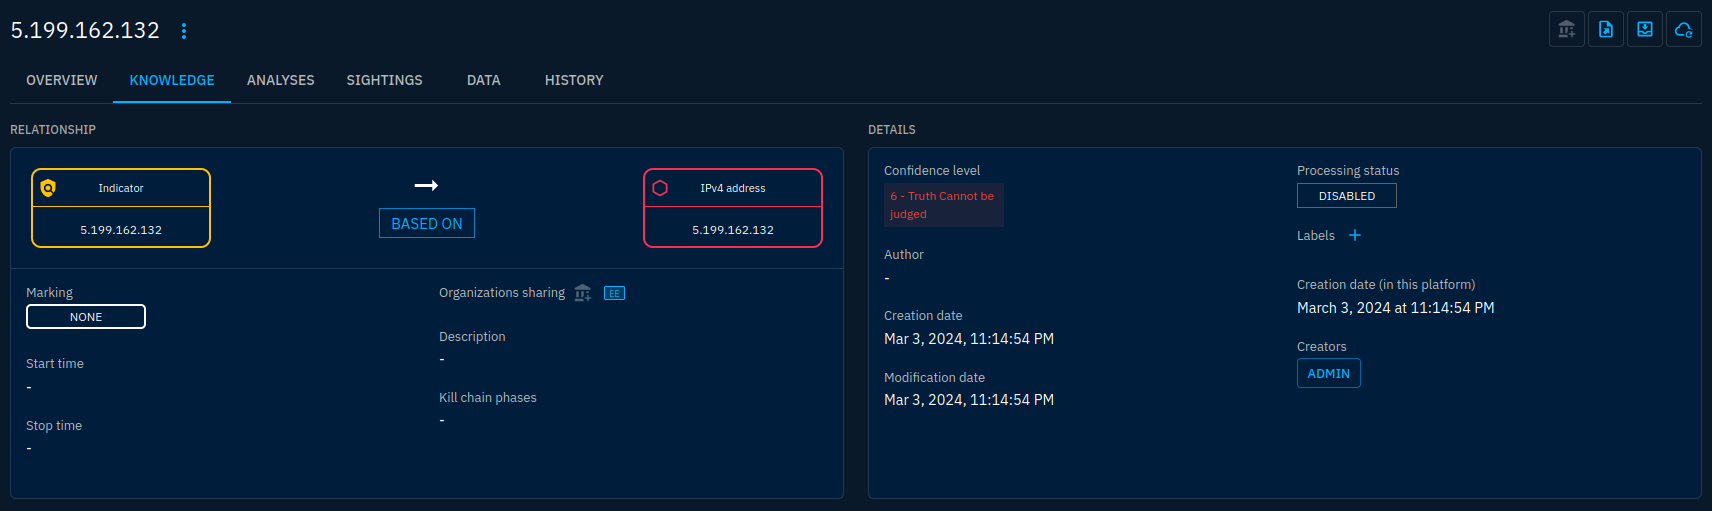
based-on relationship created between our observable and indicatorNote that confidence levels are low and most of the data is set up as default. You may have to rework the data of the relationship and the indicator object after promotion.
Ask for enrichment
In OpenCTI, most objects can be enriched if you have the right connectors. It is possible to trigger enrichment from the API using the ask_for_enrichment method:
# Let's take the observable we created in last section
observable = opencti_client.stix_cyber_observable.read(
  filters={
    "mode": "and",
    "filters": [{"key": "value", "values": ["5.199.162.132"]}],
    "filterGroups": [],
  }
)

# We want to run the Shodan connector on this observable to enrich it
# First, we need the connector's UUID
# We can retrieve it from the API:
connector_uuid = None
connectors = opencti_client.connector.list()
for connector in connectors:
  # Note that the name is configured when setting up the connector and may vary
  if connector["name"] == "Shodan":
    connector_uuid = connector["id"]
    break

# We can then ask for enrichment
work = opencti_client.stix_cyber_observable.ask_for_enrichment(
  id=observable["id"],
  connector_id=connector["id"]
)
The ask_for_enrichment method will return a work object that describes the background task that has been launched. It is thus possible to follow the progress of the enrichment that was asked.
Add/remove a STIX object to/from a container
We saw it earlier, the platform features containers such as reports and cases. It is possible to add or remove STIX objects to a report using the add_stix_object_or_stix_relationship and remove_stix_object_or_stix_relationship methods.
# Getting a report
report = opencti_client.report.read(id="report--76f9c469-12c5-547c-9a14-2b0bbc88e25e")

# Getting a STIX object
stix_object = opencti_client.stix_domain_object.read(id="malware--7b4d56ad-3bd0-5e28-9f40-c3313d9bdeb1")

# Adding the object to the report
opencti_client.report.add_stix_object_or_stix_relationship(
  id=report["id"],
  stixObjectOrStixRelationshipId=stix_object["id"]
)

# Removing the object from the report
opencti_client.report.remove_stix_object_or_stix_relationship(
  id=report["id"],
  stixObjectOrStixRelationshipId=stix_object["id"]
)
Conclusion
Once again a beefy chapter and we are far from having covered the whole subject. We could mention the connector API which is available in the same library but for connector applications, other API endpoints (marking definitions, vocabulary, etc.) and more.
Keep in mind that at the time of writing, pycti's documentation lacks a lot of topics and you will have to look for symbols manually to fully use its power.
We finished our OpenCTI tour with this episode. Next and last chapter will wrap up everything we viewed in this series by going through a complete case study.