OpenCTI # 2 - Usage basics
Discover OpenCTI in this series. This second post gives a user overview of the platform.
In the last post we went through OpenCTI's installation process. Let's discover the interface of OpenCTI and its core concepts.
General browsing principles
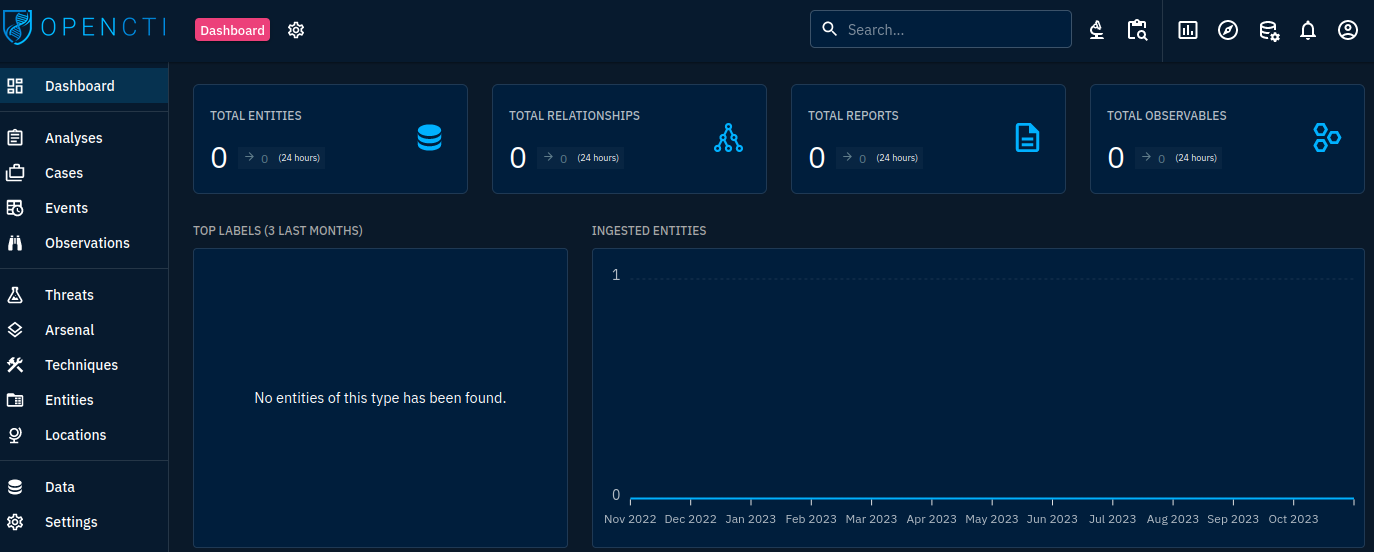
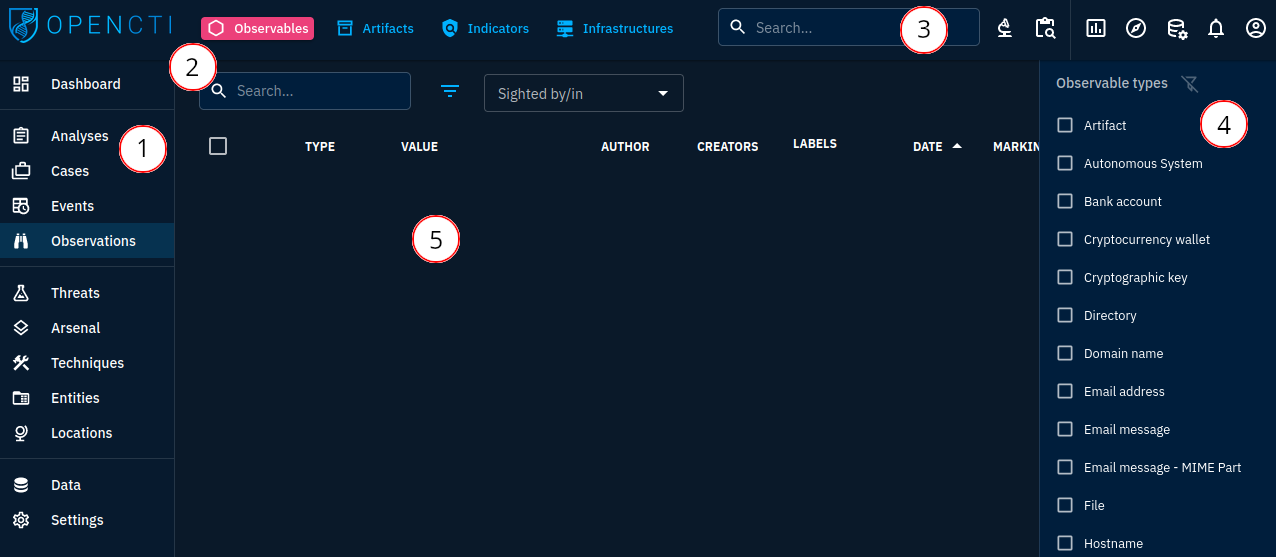
On most panels, OpenCTI will be divided in 4 to 5 parts:
- The left navigation panel: this is the primary navigation panel and will lead you to most OpenCTI modules and data sections
- The top navigation panel: this is the secondary navigation panel, browse through an object tabs or data types
- Top right navigation panel: this panel contains the search features, investigation module, bulk data import module and user modules (notifications and user profile)
- Filter panel: filter the data by data subtype
- Data panel: display the actual data
STIX jump start
STIX is a data format allowing to represent structured threat intelligence. It is divided in 3 object types:
- STIX Domain Objects (SDOs): objects that represent concepts such as malware families or countries
- STIX Cyber Observable (SCOs): objects representing observations such as network activity or files dropped on a computer
- STIX Relationship Objects (SROs): objects allowing to build relationships between SDOs and SCOs
A structured threat intelligence using STIX is a combination of these 3 types. For example, an indicator can be based on an actual observation and indicate a malware. This will be represented by something like the graph below:
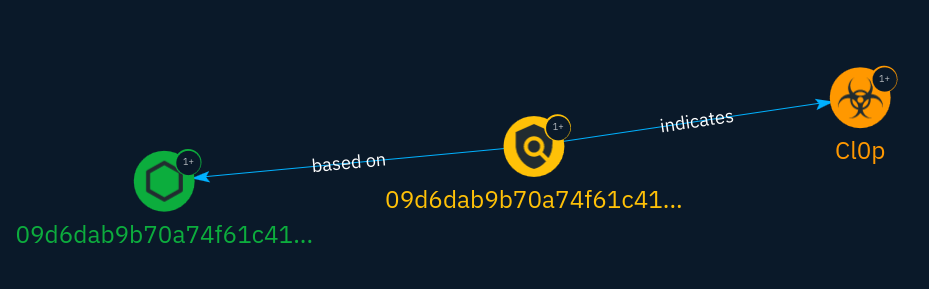
The graph represented above shows 5 STIX objects:
- On the left: a STIX Cyber Observable representing a file sample seen in the wild
- In the center: a STIX Domain Object representing an indicator
- On the right: a STIX Domain Object representing the Cl0p malware (as a concept)
- On the left: a STIX Relationship Object representing the fact that the indicator is based on the observation of a specific file
- On the right: a STIX Relationship Object representing the fact that the indicator object indicates Cl0p
We won't go here in details into the STIX standard itself but OpenCTI mostly follows it. You will find all sorts of objects that are documented in the standard. Every time you have a doubt about what represents an object in OpenCTI, refer to the STIXv2.1 specification. The same applies for any property of an object.
Most common object types seen in OpenCTI are:
- STIX Domain Objects: Indicator, Malware, Attack Pattern, Campaign, Identity (split between individuals and organizations in OpenCTI), Intrusion Set, Location (split by scale in OpenCTI), Tool, and Vulnerability
- STIX Cyber Observables: Artifact, Domain Name, Email Address, File, IPv4 address, IPv6 address, Software, URL
- STIX Relationship Objects: based-on, uses, targets, indicates, located-in, delivers, attributed-to, related-to (generic relationship)
Note that there also are STIX Domain Objects that are container objects dedicated to gather other STIX objects without having specific relationships between them. We will cover that a bit more when talking about reports in OpenCTI.
Writing intelligence
Now that we have a basic understanding of how data is organized in OpenCTI, we can take a look at how to actually add data.
Let's take the example listed in the graph above. It will allow us to cover all the basics with a simple, yet real, example.
First things first, let's begin by creating a Malware object to represent the Cl0p ransomware family. This will allow us to add context to the indicator we will create based on our observation.
Cl0p ransomware has been already documented before and is referenced in MITRE Att&ck as S0611 so we can avoid reinventing the wheel and just base our knowledge on what exists publicly.
Go to Arsenal -> Malware and use the plus button to add a malware object:
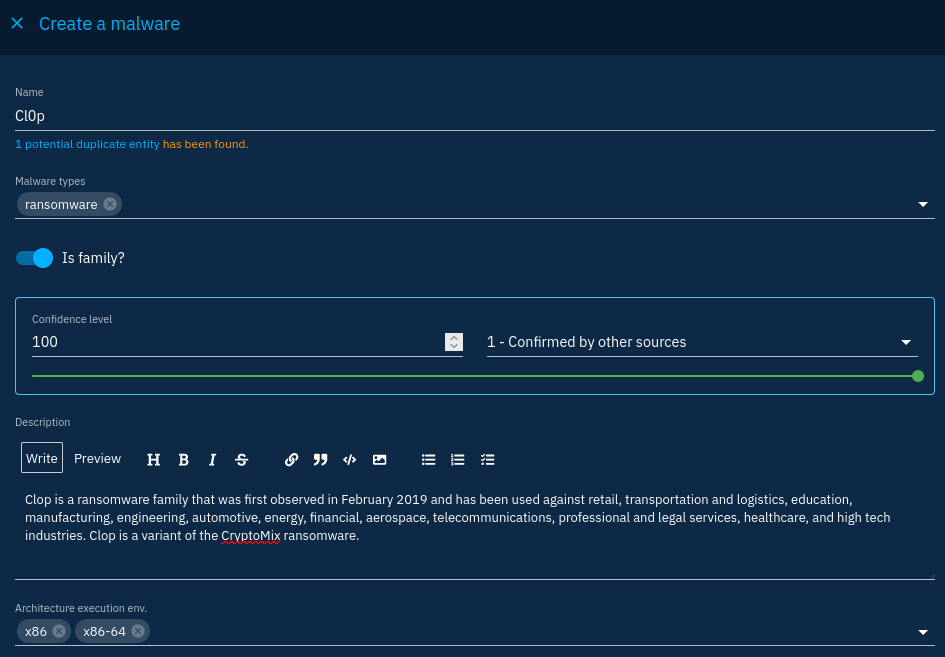
You will find some contextual information you can directly add to the malware such as its execution environment or implementation language. Fill in the data as you wish. Note that no hash or file indicator is asked for, this is not the purpose of the malware object.
You will also see that other fields are a bit more complicated to fill in:
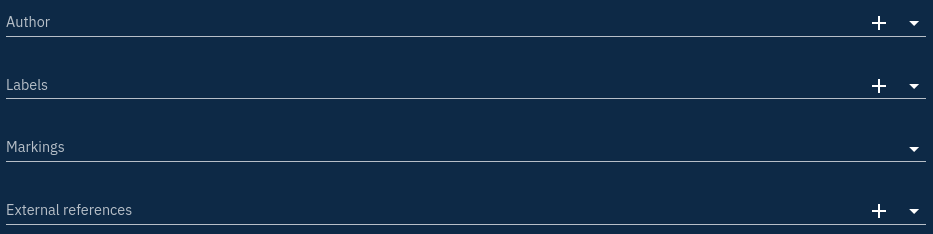
First of all, the author field allows to add context on who created the object. I like to add the original source for each object but you can do as you want. It corresponds to the created_by_ref field of the STIX specification and must point to a valid Identity object if specified. That is why, OpenCTI will ask you to create an entity if you click on the + button to the right of the field.
Labels add more context to an object using keywords. On a typical OpenCTI installation I would let the users unable to create labels just to keep things tidy. For example a ransomware label would not add any information regarding the malware type field.
Markings are STIX's marking definitions. Marking definitions can be customized on the platform to allow additions of statements on objects such as copyrights. By default, OpenCTI integrates and supports the TLP, that can help control information dissemination (TLP levels can be taken into account to define data visibility).
External references is a list of references to external sources. Here we could indicate the link to the MITRE Att&ck page to let users retrieve the original source.
These 4 fields are almost everywhere on the platform. Policies should be created and enforced to ensure data consistency all over the platform.
After creation, landing on the malware object should look like this:
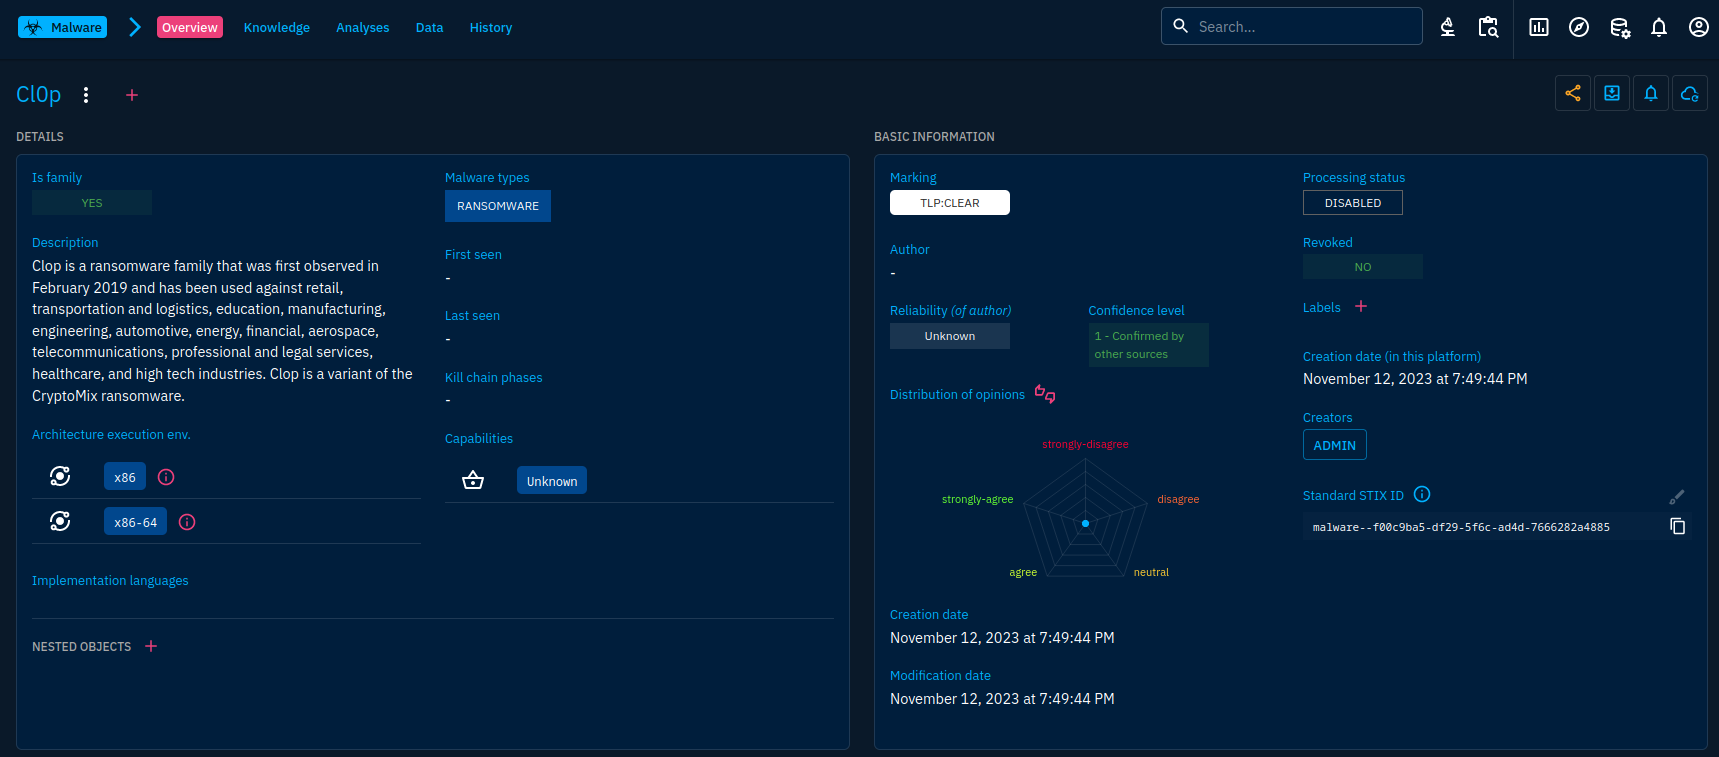
A few things can be noted in this view.
First of all, check how the second-level navigation changed to display tabs regarding the malware object. These tabs are tailored for each object type. In the case of the malware object, the knowledge tab will display information based on relationships to other objects, the analyses tab will list containers referencing the malware. Data and history are common to nearly every object. They will display files and actions related to this object.
You will also see a menu and a + button at the right of the object's name. They allow to modify or delete the object and add aliases to it. The set of buttons located at the right at the same level allow to manage object's distribution (Enterprise edition), add the object to a container, enable a notification each time an event related to this object occurs and run enrichment connectors. We'll dive later in those features.
The details and basic information panes are always present on the first tab of an object. They will gather the common properties of the object (right) and specific ones (left). A standard STIX ID is automatically generated but additional ones can be added if needed.
More detail is showed below those 2 blocks:
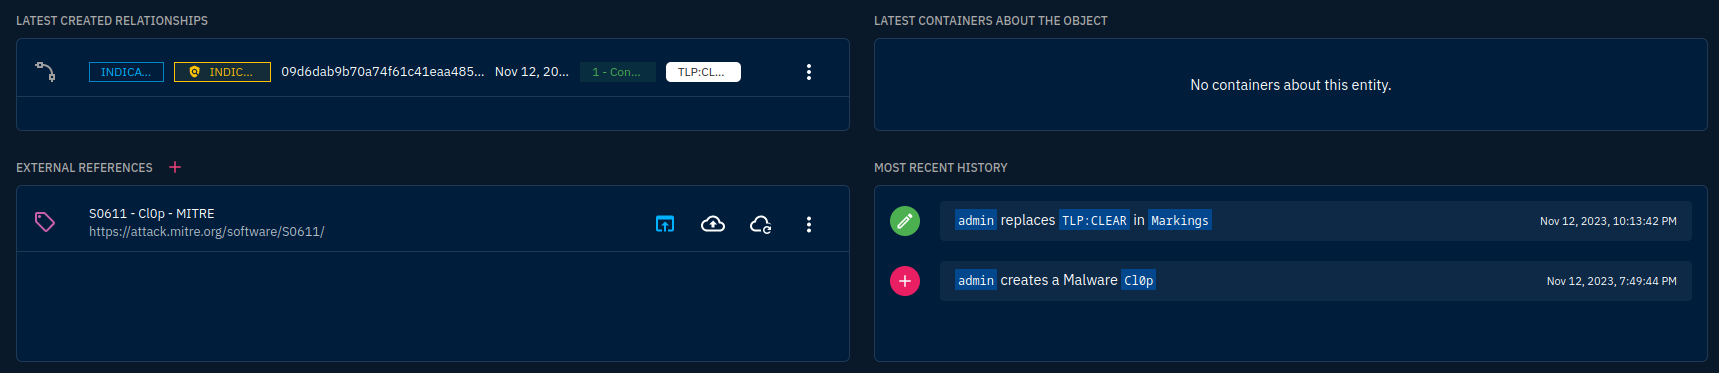
We can then create in the same way, an observable and indicator objects to represent a particular sample of this malware and its detection rule. Go to Observations -> Observables:
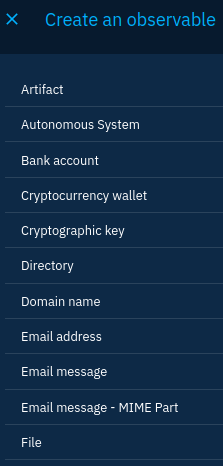
You will see there are a lot of SCO types you can create. For our example, let's say we have a file sample gathered from Malware Bazaar:
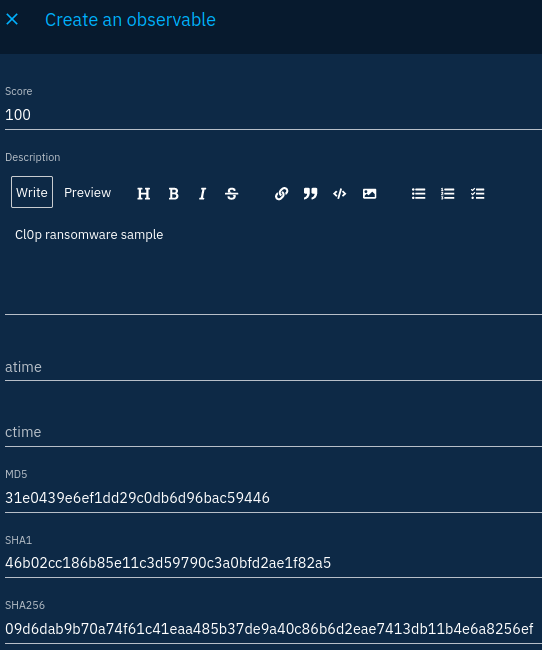
Most fields on observables are straighforward. There is however a first which is the score. This is not defined by STIX and is specific to OpenCTI. It allows to assign an evaluation of how malicious the object is.
The second field I would like to highlight is the "Create an indicator from this observable" switch located in last position in the form:

This switch is really handy. It will automatically create an indicator for the observable (make sure your observable represents a malicious observation) and link the indicator to the observable using a based-on relationship. Although things are automatically created for you, don't forget to check that they are indeed accurate. Check this box to automatically create our indicator.
The observable pane will be similar to the malware one. I won't get into details here but I encourage you to explore the different panes. Here are some exercises for you:
- Go to the indicator based on the observable.
- What is the intermediary page you land on when clicking the last created relationships list element?
Lastly, there is one piece of information missing in our knowledge: the fact that our indicator indicates Cl0p.
To create the indicates relationship, we must go on the indicator object. From there, adding a relationship is straightforward: we go to the knowledge tab and create a new relationship using the + button, select our malware, click "Continue" and fill in the information related to the relationship.

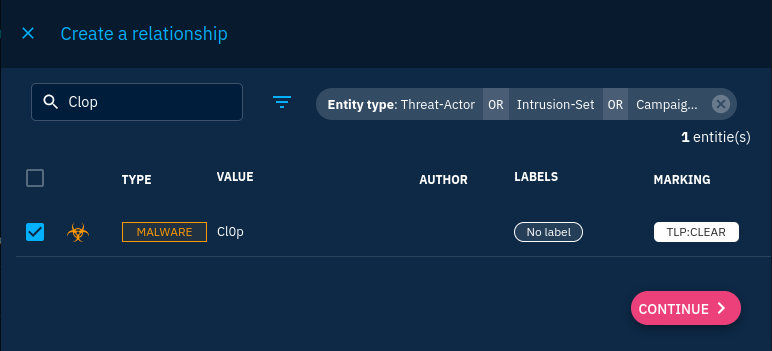
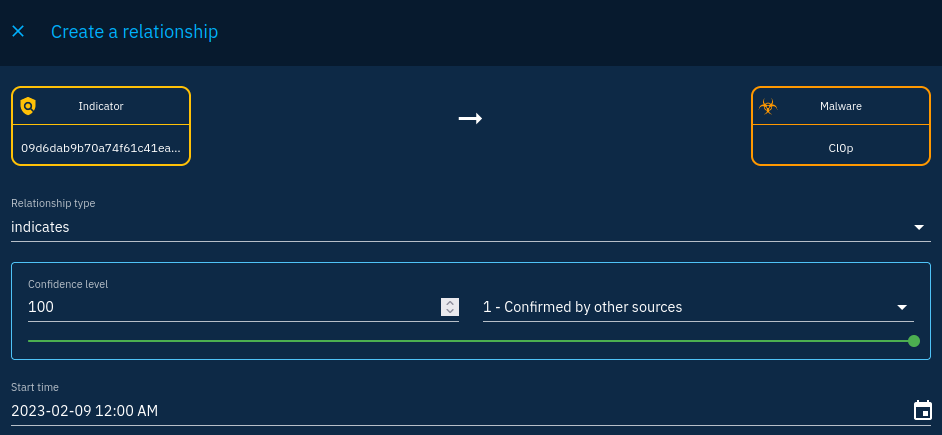
Create an indicates relationship between the indicator and the malware
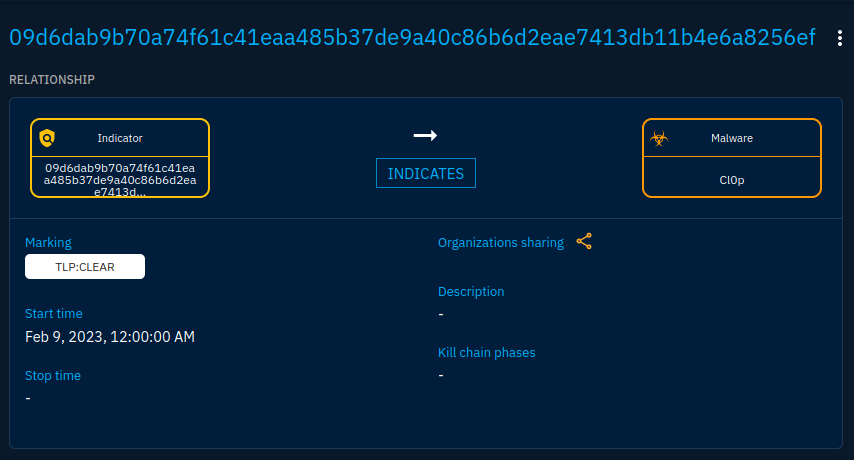
Once the relation is created, it is added to the list of relationships in the knowledge. We will see a bit later how we can transform the knowledge in the graph above but all you need to know is that your indicator now has a malware to indicate! And with that our knowledge is complete.
Conclusion
We saw in this post that we can navigate the platform to view, create and update data manually. Data creation is a bit tedious and can be assisted by automation. We will see that after managing the platform to tailor it to our needs in the next episode.