Use OpenWRT as a MITM router
To make network analysis easier, it can be interesting to setup a MITM router. Using a Raspberry Pi and OpenWRT, this can be made at a low cost
When you’re analysing an IoT thing, one of the most useful approches is to sniff all the network activity. Doing so isn’t always simple with an out-of-the-box Kali installation and may break its network configuration.
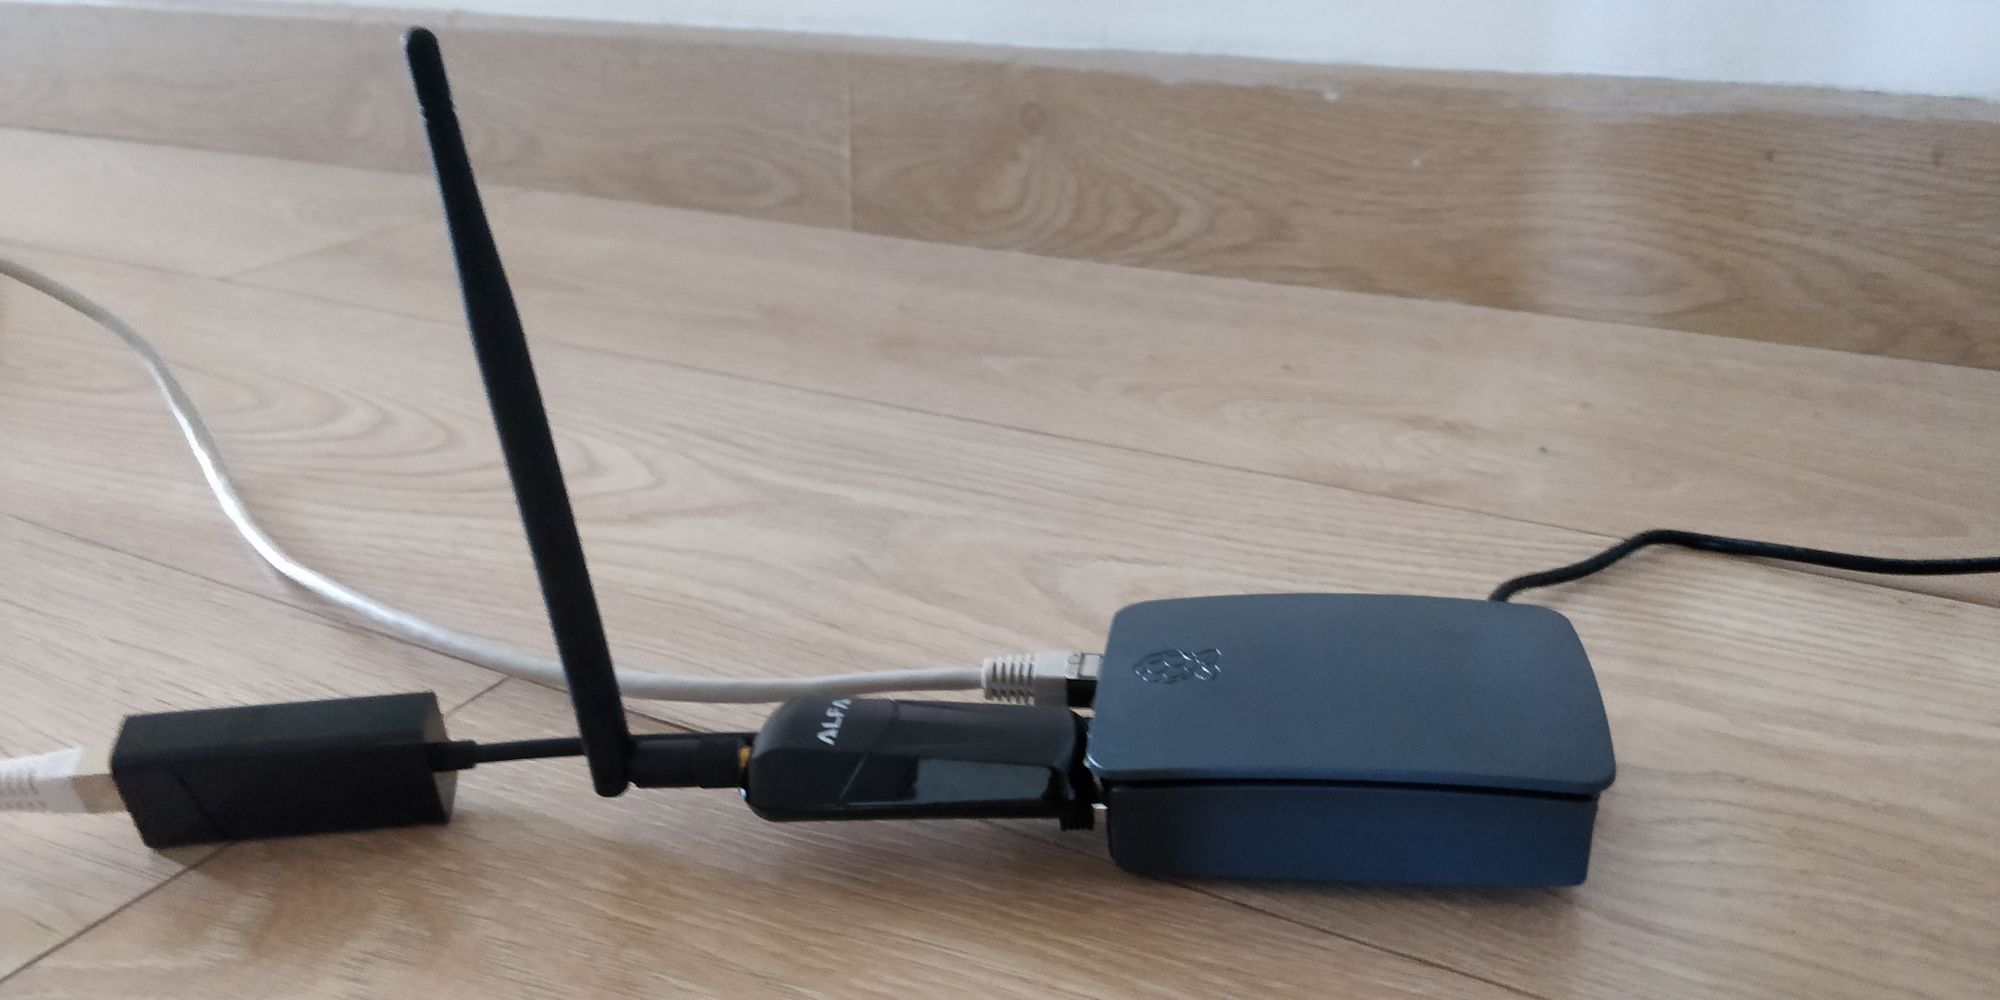
I had an approach consisting in using Kali on a Raspberry Pi equipped with its native ethernet interface coupled with USB ethernet and WiFi adapters. It does the job, but I wanted a simple way to administer the network aspect (fine firewall tunig, transparent proxy) because I am lazy.
Moreover I never used OpenWrt before. So it was the occasion to discover it.
Hardware
First of all, I didn’t rebought any hardware. I simply took my existing Raspberry Pi 2 B and installed the appropriate OpenWrt on it.
You can find OpenWrt images for the Raspberry Pi on their website: https://openwrt.org/toh/raspberry_pi_foundation/raspberry_pi
Just decompress the image and flash it on a MicroSD card. The first big advantage of OpenWrt is that it is really lightweight. The final filesystem only needs a few MB. The default filesystem size is around 200MB.
Then, attach a screen to the Raspberry Pi and power it. Let the system boot and type enter to get your root console. Of course, you can use the passwd command to change the root password (empty by default).
My Ethernet and WiFi dongles didn’t have any driver preinstalled. So in first place I had to define the eth0 interface as a WAN (with DHCP client activated) to be able to install the relevant packages.
You can do this by editing the file /etc/config/network and setting the interface lan to the following configuration:
config interface 'wan'
    option ifname 'eth0'
    option proto 'dhcp'
Just to make things easier, you can also edit the firewall configuration (edit /etc/config/firewall) to make sure the web interface is accessible from anywhere:
config zone
    option name 'wan'
    option input 'ACCEPT'
    option output 'ACCEPT'
    option forward 'ACCEPT'
    option masq '1' # May be deleted to deactivate NAT
    option mtu_fix '1'
    option network 'wan wan6'
Restart the services:
# /etc/init.d/network restart
# /etc/init.d/firewall restart
Open your browser and go to the IP address of your Raspberry Pi. Log in and go to the Software page to search for the relevant driver packages if necessary.
Configure the network interfaces and the firewall
I will assume for the next part that you have 2 physical interfaces: the native ethernet adapter of the Raspberry Pi (eth0) and the ethernet adapter connected into your USB port (eth1).
First create a network interface using the web interface (as I’m lazy, the whole process described afterwards uses it):
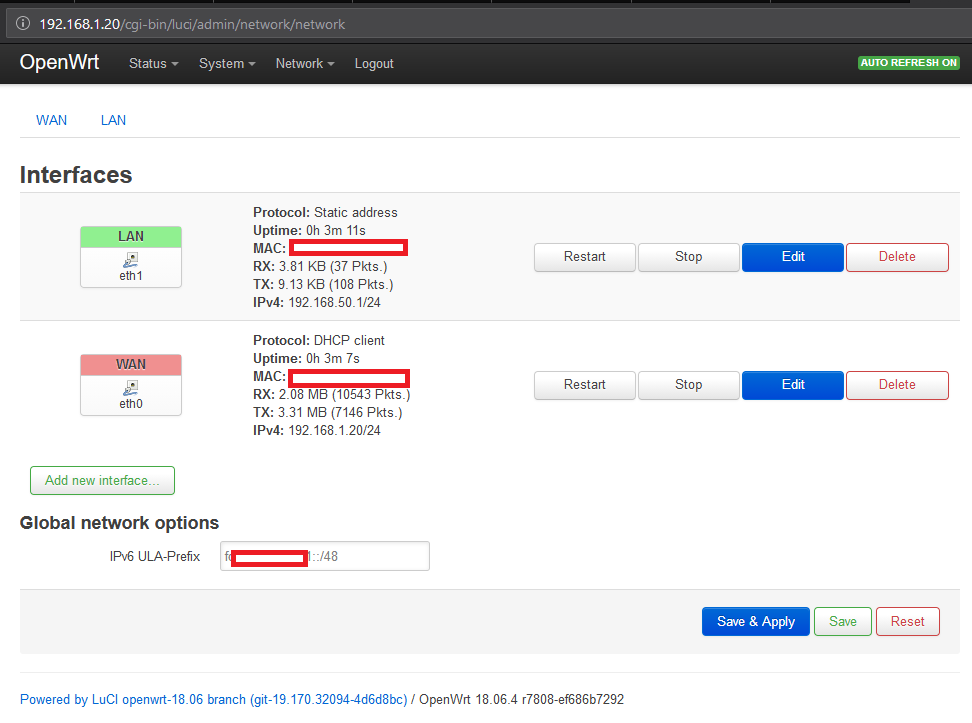
I gave the name LAN to my test network (where the device analyzed will be connected) and the name WAN to my home network. It may look confusing afterwards, but I refer to these networks in the rest of this post.
Make sure to activate the DHCP server in the LAN and verify that the appropriate firewall zones are applied to each interface. At this stage you should have everything correctly set up to access the Internet from the LAN network (as well as every IP address in the WAN network).
In a first time, you may want all the traffic to pass without doing anything. Install the package tcpdump (for example using the Software page on the web interface) and activate and connect to SSH to use it as usual (and retrieve PCAPs by SCP). Another way me be to setup a SOCKS proxy, I didn’t try this one…
Next you may want to restrict the traffic. As for a usual firewall, you may delete all rules (in the Traffic Rules tab) and add a “Deny All” one:
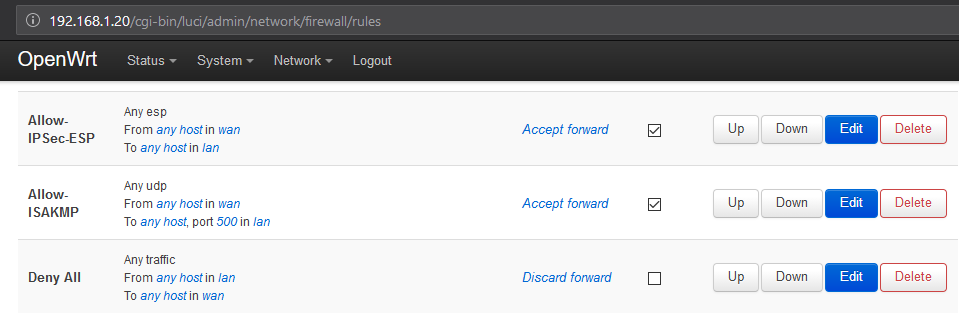
You can then open traffic type by type to allow a host on the LAN network to access a specific service.
Don't forget to disable the default rules if they have any effect on your particular configuration. It let them by default and this was fine for me. Moreover, not that the order of the rules are important: they will be executed from top to down.
Everything now communicates using HTTP or HTTPS. So logically the next step is to automatically intercept this kind of traffic on-the-fly. So we have to install a transparent proxy.
Go to the Port Forwards tab of the firewall configuration page. Add a new port forward and set it as following to redirect port 80 (do the same for any other HTTP(S) port):

In some proxy softwares (like BurpSuite Pro) you may have to activate the invisible proxy support. Moreover, you can either specify a port range or define a new port forward to forward HTTPS traffic aswell.
Conclusion
OpenWrt on a Raspberry Pi is a simple tool to examine something connected to the Internet with hardware commonly found in a hacker’s lab.
It simplifies some technical aspects regarding mainly the traffic redirect and traffic control to the Internet. It also avoids to do some tiedous configuration steps on a Linux host each time it is needed to intercept traffic and simplifies the build of a test environment.
Moreover, the Raspberry Pi allows to exchange several microSD cards. With a single Raspberry Pi it is possible to have multiple systems we can interchange with our needs.